Connecting your PEL103 portable energy logger to a network is often a really useful thing to do, because it gives you access to all of the data collected by the PEL remotely, from any location where you have network access. And, if you have a network access point conveniently close to your PEL, all you need is a standard cable to hook it up to your network. But what if there’s no network access point near your PEL? The answer is to give your PEL WiFi capability. And that’s easy to do. This blog post will tell you how.
But why would you decide not to monitor the voltage, since portable energy loggers (PELs) like our popular PEL103 always make provision for measuring both current and voltage? The answer comes down to convenience. Arranging to measure current is easy – you simply wrap the Rogowski coils that are used to sense current around the conductors and the job is done. There’s no need to make connections to live parts.
The first thing you’ll need is a WiFi range extender. It’s a gadget that’s readily available from all the usual online retailers and it shouldn’t cost you more than £20. The one we’re going to describe in this blog is the TP-Link TL-WA850RE, but many other types are available and the setting up procedure should be very similar for all of them.
The second thing you’ll need is a PC with a web browser. (Alternatively, you can use a smartphone, but the smartphone can only be used to set up the WiFi connection, not to access the data from the PEL after you’ve finished the setting up.) Make sure that your PC doesn’t have a wired network connection. If it does, temporarily disconnect it.
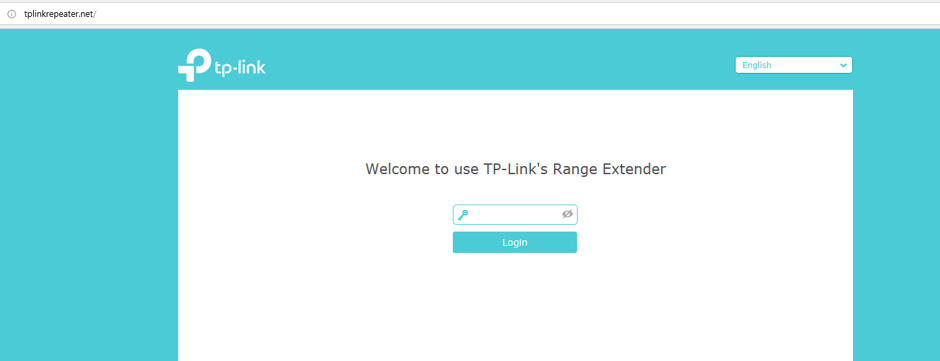
Now plug your range extender into a nearby mains socket and wait until the wireless LED on the extender is steadily illuminated. Open the WiFi connection utility on your PC (or smartphone) and connect to the network called TP-Link_Extender. Your web browser will probably launch automatically but, if it doesn’t, launch it manually then type http://tplinkrepeater.net or http://192.168.0.254 into the address bar. The TP-Link Range Extender web page will open, and you’ll be asked to create a password. (See the picture below).
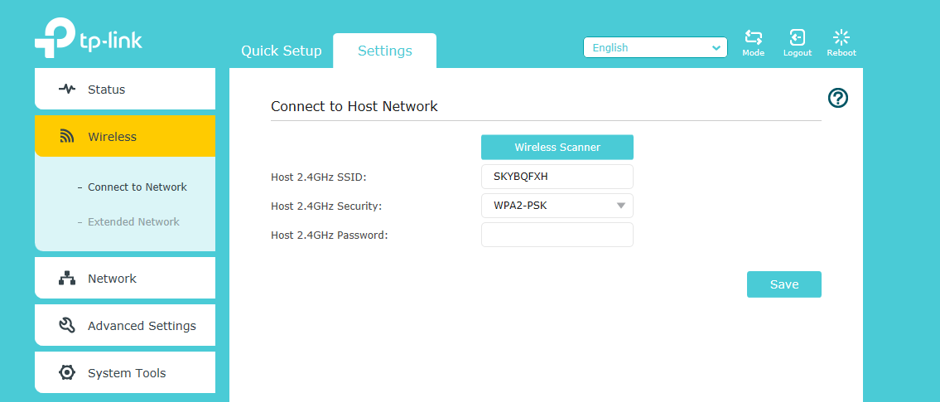
After you’ve created your password, the range extender should automatically scan for wireless networks in the vicinity. If it doesn’t, a wireless scanner web page will appear as shown in the next picture, and you can start the scanning manually. When it’s found the network that you want your PEL connected to, select it, enter the password. (This is the password for your wireless network, NOT the range extender password you just created!) Click ‘Save’ on the webpage displayed on your PC, and the range extender will reboot.
Take a look at the range extender and, if everything has gone to plan, the “RE” LED will be illuminated. Now reconnect your PC (or smartphone) to your network, either by wireless, or by reconnecting the network cable you unplugged at the start of this procedure. You’re almost there!
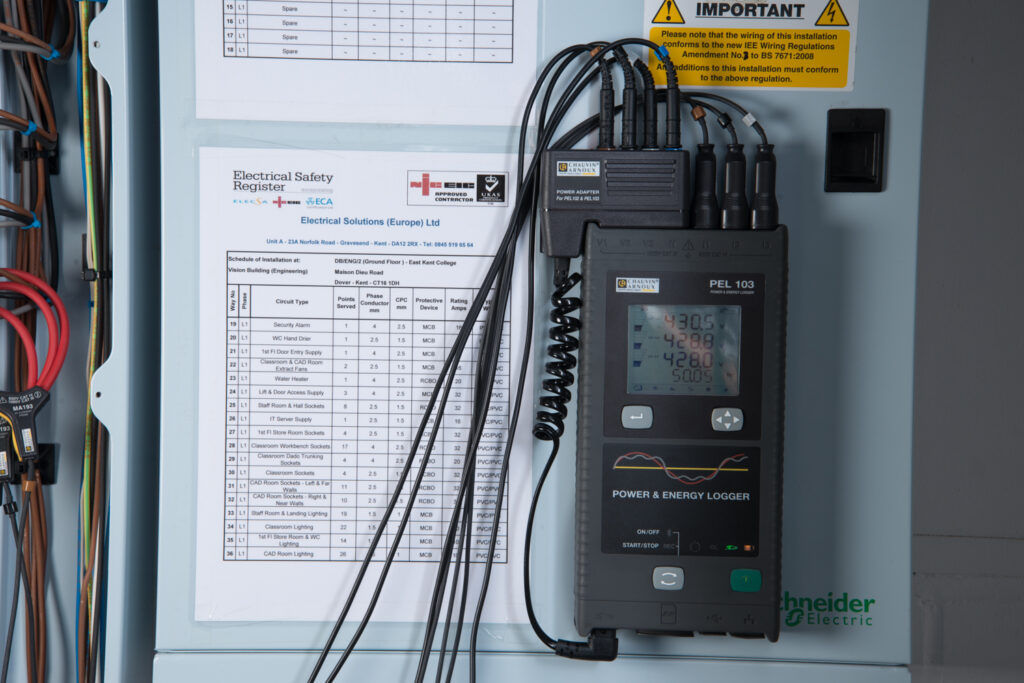
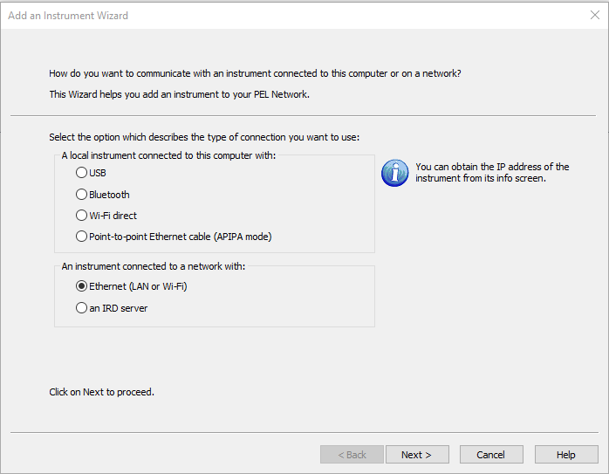
Connect your PEL to the range extender with a standard Ethernet network cable and launch the PEL Transfer program on your PC. (If you’ve been using your PEL for a while, you’ll probably have this installed, but if you haven’t, you can download it free of charge from the Chauvin Arnoux website). In PEL Transfer, select “add an instrument” then select the “Ethernet” option, as shown below. Click “next”.
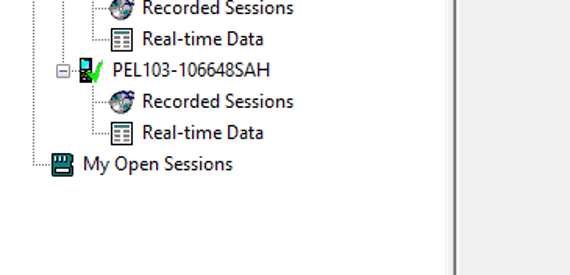
Go to your PEL and click on the info screen where you’ll be able to see the its IP address. Make a note of this. Go back to your PC and enter the address in the address box of the PEL Transfer program. Once the program confirms that it has established a connection, click “finish”. Your PEL should now be visible in the tree of data sources, as shown in the picture.
Congratulations! You’ve added WiFi capability to your PEL103! By the way, if this procedure sounds longwinded and complicated, it really isn’t! Like a lot of things, it’s much harder to describe than to do. It should take you no more than ten minutes – probably a lot less. And, if you should encounter any issues, don’t forget that the Chauvin Arnoux technical support team is always on hand to help out.
If you’d like to learn more about how to save energy and become more efficient, download our eBook that outlines the path to sustainability and efficiency…